This article explains for Admins how the Control Center works. Here, buildings and floor plans, adding users and devices, and organization settings are covered. Statistics are not covered here, we have separate articles for that.
Only users with the Admin role are granted full access to the Control Center. This is the administrator environment where you set everything up for use. Users with the Manager role, will only have limited access to the Control Center and will only be able to see occupancy statistics.
To log into your organization’s Control Center, go to domainname.flexwhere.com/cc. The domain name is self-selected by the Admin of the organization or is created by us. If you don’t remember your domain name, please contact us.
To start reserving and occupying spots in Flexwhere, the buildings and relevant floors must first be added. This is very easy, by clicking on the blue plus button on the right side. There you are then given the choice to add a building or floor.
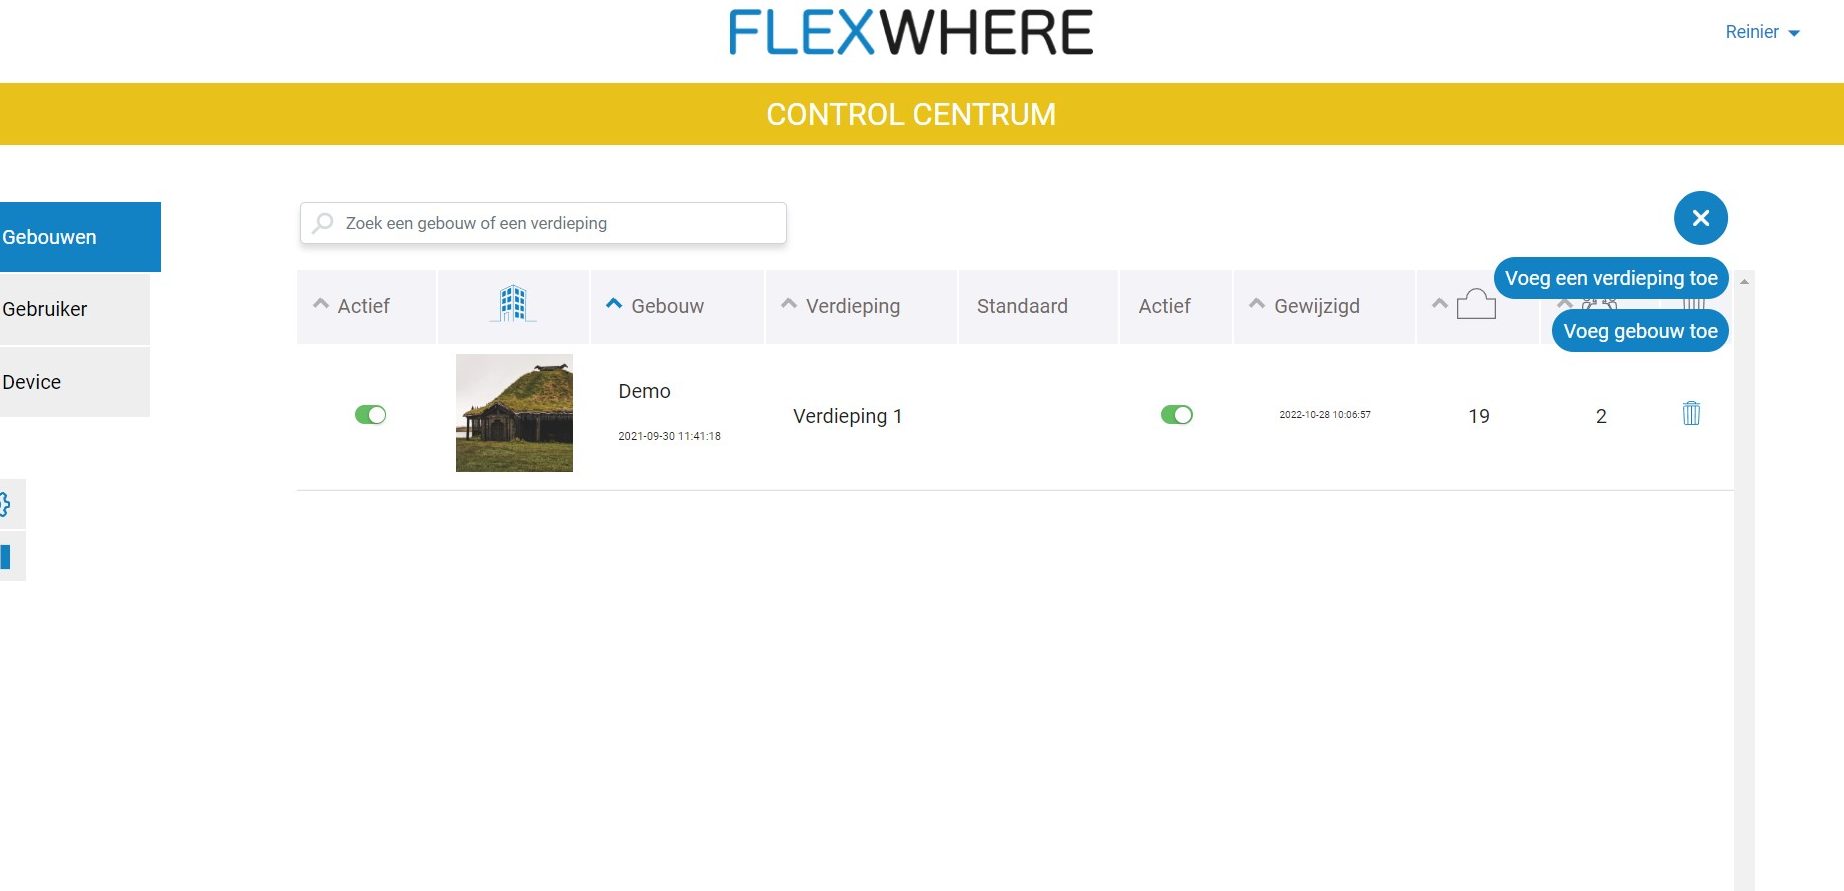
If you add a building, you can add its address and a photo of it. Adding a photo is especially useful when you are going to use more than one building. In the live environment, this image is then displayed with the building to provide a better overview.
When you have added a floor to a building, then its floor plan should also be uploaded. We normally do this for you, but this can be done by you. The first layer is the floor plan and on this can then be placed workstations, parking spaces, meeting rooms and work zones.
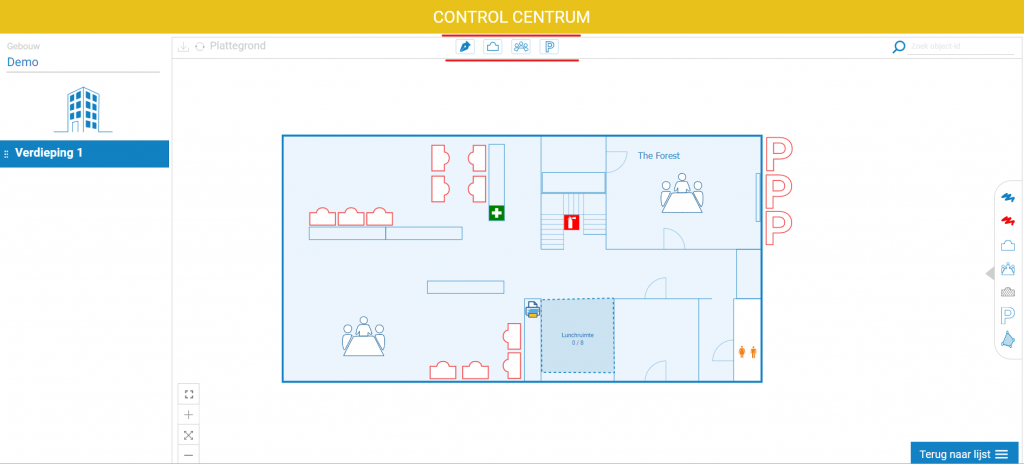
Above the map are the buttons, where you can left-click to select what you want to add. A workspace, parking space or meeting room can be placed anywhere on the floor plan, again with left click. To move it, you can use the arrow keys on your keyboard or you can drag it by holding down left-click. Adding a work zone works slightly differently, as you draw it on the floor plan. When you finish drawing, click on the first bullet where you started drawing and the work zone will be added. Here you can still specify how many people there is room for in this zone and what the name of the zone should be.
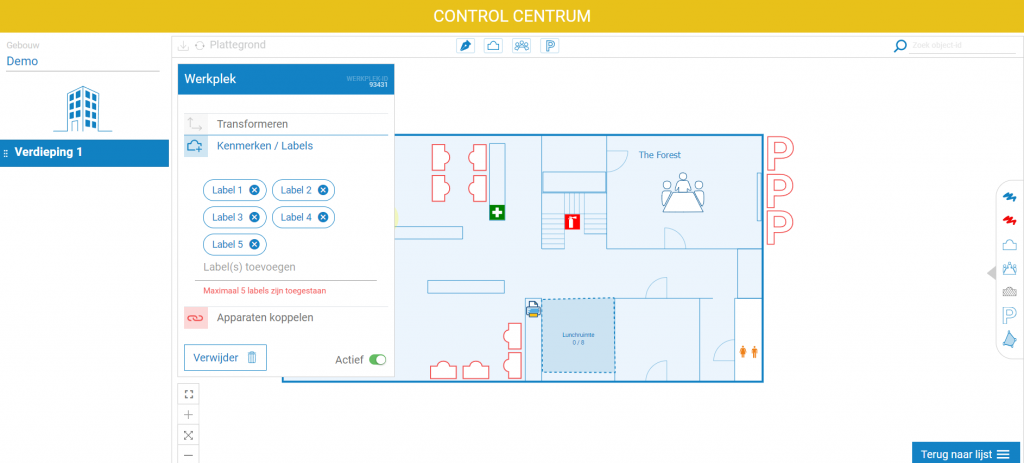
Labels can also be added to a workspace, parking spot and a meeting room so that more information about the spots can be shared. A maximum of 5 labels can be added per spot. A workstation can also be linked to a device to have it automatically occupied in the live environment. More on this in the devices tab. In a meeting room, you still have the choice of turning Adhoc on or off. If you have Adhoc turned on, it means you want to reserve the space in Flexwhere. If you turn it off, then the space cannot be reserved in Flexwhere and a link must be set up. We offer a direct link to TopDesk, or an indirect link via SFTP. In this case, please contact us.
A list of all users should also be added. This can be done manually or through a link. Direct interfacing (SCIM) with MS Azure is possible. Otherwise, there is also the option of setting up an indirect link, via an SFTP environment. This requires more technical knowledge. Both links are leading, which means that all modifications must be intended at the users via the linked system and not in the Control Center. Only the users’ roles must then be maintained in the Control Center. Please contact us if a linkage is desired.

Of course, it is also possible to do it without a link and manually add the users. This can be done one by one or a CSV document can be uploaded, which contains all the users. If you want to use a CSV document, it is important to always include all users in that, because when you upload it, only this list is kept and all users not in this list are then automatically deleted. The only fields that are required are an email address and a username.
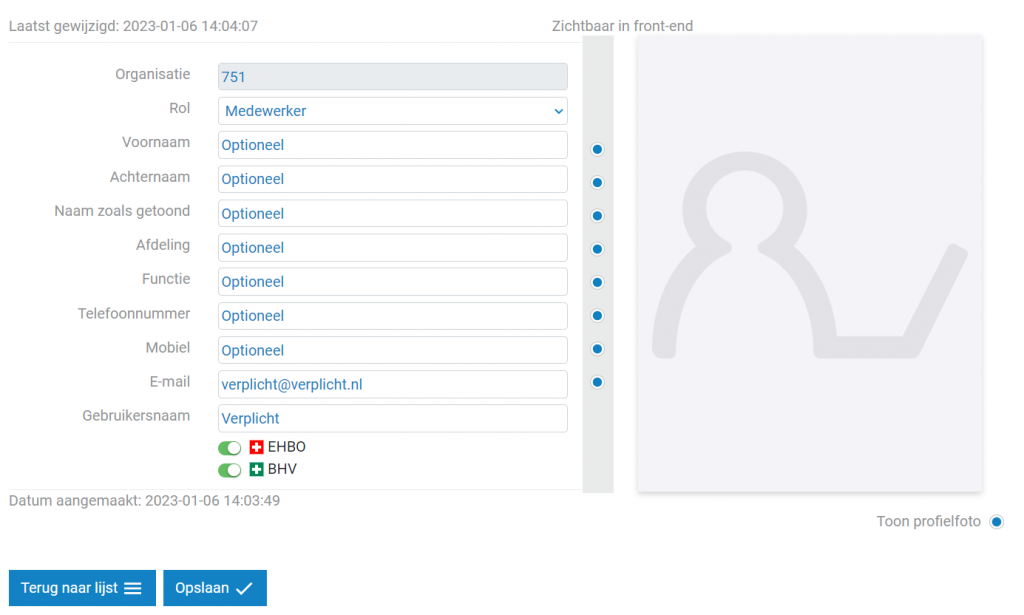
There are 4 different roles in Flexwhere;
- Admin: An Admin has access to the Control Center and can manage everything. In the live environment, an Admin also has no restrictions.
- Manager: A Manager also has access to the Control Center, however, only gets to see occupancy statistics here. Statistics can only be viewed with a pro license.
- Desk Planner: A Desk Planner can make additional reservations for others in the live environment and schedule group reservations. Through the Web App, this role can also always book 365 days ahead.
- Clerk: A Clerk can reserve and occupy a spot only for himself.
Adding devices is only necessary if you also want to occupy workstations using our Desktop App. Adding devices can be done manually or via an indirect (SFTP) link.

Of all the devices on which Flexwhere’s Desktop App will reside, the device ID must be added. To use docking stations, instead of a device ID, add a MAC address. All devices that are flexible, such as laptops, add as device type laptop. Devices known as laptop type will get a pop-up when starting the PC to indicate where you are. All fixed devices you give the device type desktop. Only devices added as desktops can be linked to a workstation. If a device is linked to a workspace, you will see a green paperclip next to it. Clicking on this will automatically take you to the workstation to which you have linked the device.
To get to the organization settings, click on the small cog on the left side of the screen. You can switch between 3 tabs here, the legend, the organization settings and the activity measured in the live environment through the Desktop app.

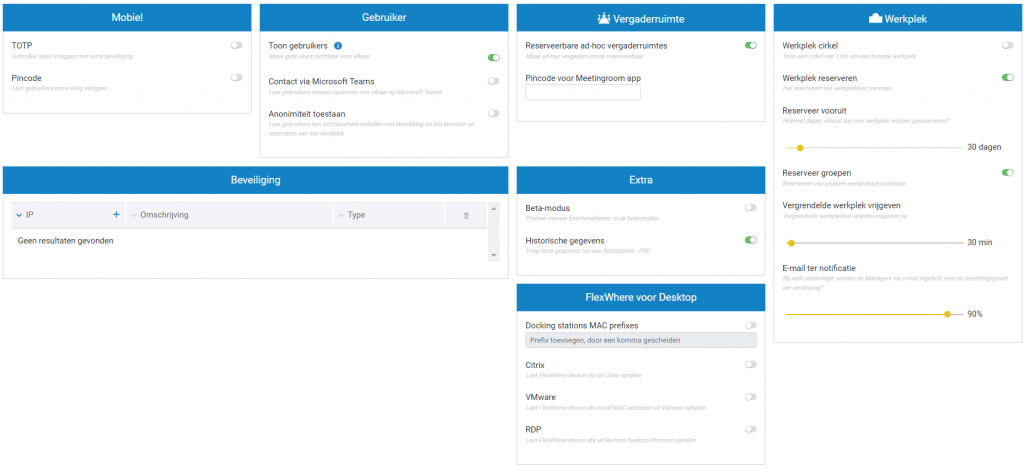
In the organization settings, you can adjust a few things. For example, whether you want extra security when logging in via the mobile app. You can also set how far ahead reservations are allowed for all employees. When using the Desktop app, you must also enter the IPs allowed to access your environment here. If you have added Mac addresses of docking stations in the device list, you must also enter the MAC prefix here. These are the first 6 characters of the MAC addresses. If you have multiple docking stations of the same brand, you will find that they often have the same prefix.
So in the tab, Flexwhere for Desktop, you can see the activity of the Desktop app within your environment. If no activity from a user comes in here, that means they do not have the Desktop App installed or this user is working through an IP that is not listed in the organization settings. So for those users whose activity you do see, you can see, for example, what username is recognized and what device they are using. You can always check here if a user has problems with the Desktop app.


 Eddy
Eddy